17 July 2020
Tent poles are tensioned with shock cock – an elastic cord that helps the tent poles snap back together and keep their shape. Over time the elastic in the shock cord can deteriorate causing it to slump and eventually it will make your poles very hard and almost impossible to use. A replacement tent pole set can be a pricey exercise, so if your poles are in good shape, then it’s far cheaper to replace the cord.
Just a few things before we get started. First, the tent poles are from my Sierra Lightning II FL, and unless you have the exact same tent, the amount of shock cord you’ll need will differ between tents. My tent has 3 poles, that are all connected by a swivel. When measuring the amount of cord, I find it safer to just buy the same amount as your pole measurements so there’s room for error. However, when you tension the cord, you will be tensioning it about 2 sections shorter than the actual length of your poles.
You can pick up shock cord at most reputable camping stores or online.
What you'll need:
- Shock cord (similar diameter to your current shock cord, enough for the length of your poles.)
- Sharp scissors
- Tweezers and wire (you can use wire from a coathanger, or see what you can find at craft stores or Bunnings if it needs to be thinner to fit through the ferrule)*
- A helping hand
* For poles that have an inverted stopper in the ferrule, rather than a pull or screw-out style stopper.
You can also watch how to do replace your tent pole cord here on YouTube.
Step 1
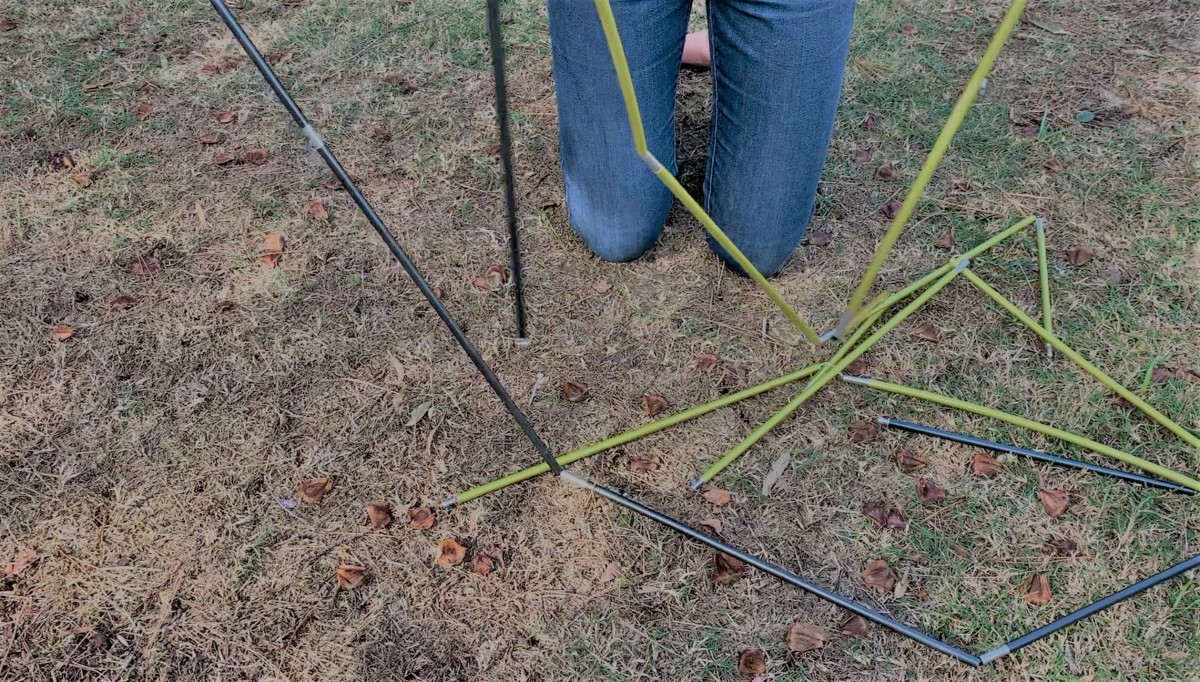
Lay your tent poles out. Do this in an area where you have plenty of space to keep them in order as you'll be unthreading them.
Step 2
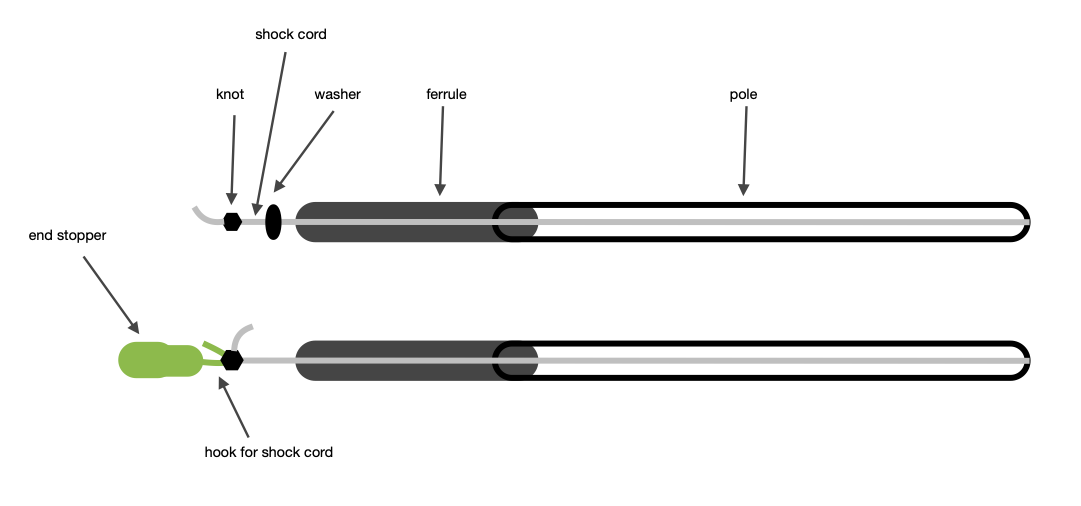
Remove the end stop from the end of your tent pole.
* If your tent poles are the older style with a stopper or washer in the ferrule, you’ll need to pull the knot out of the stopper with tweezers and cut or untie it to pull it through and remove the old cord. You’ll need to do the same process in the opposite end when you get there.
The diagram below shows the difference between poles with a pull-out end stopper and those with a washer.
Step 3
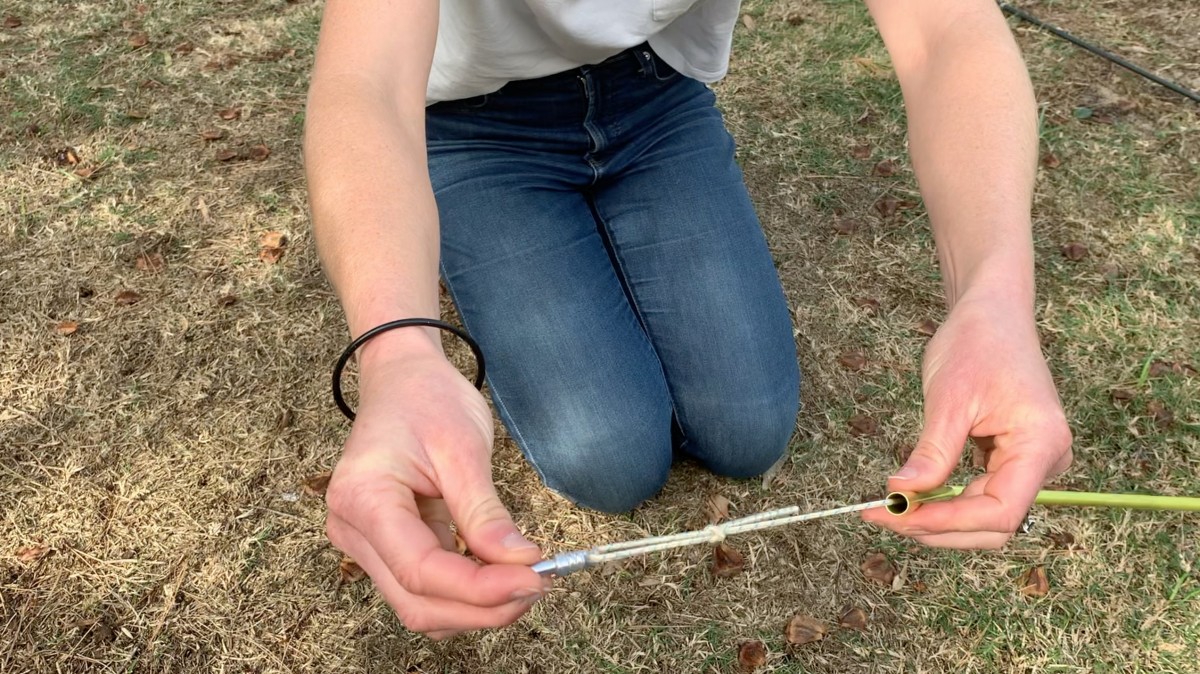
Untie the string or cut it from the end stop and place the end stop down. Now start pulling out the old shock cord and make sure to place your tent poles down in the same formation as you go.
Step 4
Now get your replacement piece of shock cord.
I have pre-measured mine and marked the point where I want it tensioned to, but not cut it as I find it easier to tie and cut afterward.
Start with the first section of pole and push your shock cord through toward the end stop.
Then secure it to the end stop with a knot.
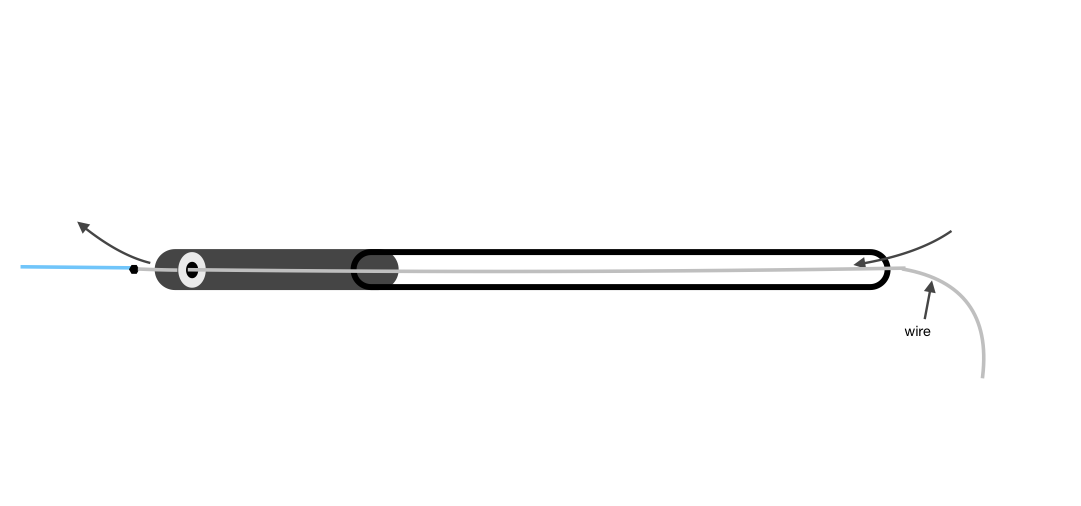
INVERTED STOPPER: If you have an inverted stopper, you’ll need to get your wire ready. Thread your wire backwards toward the stopper, then push the wire through the stopper hole and secure it to your shock cord. Pull the shock cord back through the hole and before you get to the end tie a secure knot large enough to stop it going through the hole then pull the cord all the way through.

Step 5
Now that the end is secured, pull your shock cord through the remaining sections of poles, keeping them in the order they have been laid out in.
Step 6
Once you get to the end, tension the cord until you find the mark on it, then secure it to the end stop making sure to keep the appropriate amount of tension in the cord.
I like to double check the tension is ok before I cut the cord. The cord should be tensioned just enough to bring the poles together, but not too much so that when they're folded the shock cord is over-strained.
INVERTED STOPPER: Before you get to the end you’ll need to pause before the last piece of pole section. Before you thread the cord through the last section, tie the cord off using a big knot that will not be able to slip through the pole, or secure to it to a stick. Now grab your wire again and push it through the last section of pole starting on the opposite end and moving toward the end stopper. Feed the wire through the hole. Now return to the opposite end of the stopper, untie the knot on your second last piece of pole section and secure it to the wire, now pull the wire through until the cord is through the hole. Tension accordingly and tie off with a knot that is large enough to catch on the hole.
Step 7
When you're happy with the tension, cut the cord neatly and tuck the end back inside the pole sleeve with the end stop and secure the end stop.
You may need a hand to cut the shock cord here, it’s tricky to cut and is a lot easier when someone is tensioning it for you.